Updated by Tina Sieber on February 28, 2017.
Everyone knows Clippy. But are you friends with Pilcrow??
Stop there if you know what I'm talking about. You know more about Microsoft Word than I do.
Okay. Let me test you a bit more by asking about “widow lines”. If you still have that, then stop. If you haven't, welcome to this side of the line where we think we're proficient in Microsoft Word. This is how you can get Microsoft Word for free. It's how you can get Microsoft Word for free. I don't want to pay. The full Microsoft Word experience? Don't worry, here are some ways to use Microsoft Word for free. Read More
You're fine as long as you activate a document and just type. But billions of Redmond dollars went into making this the Swiss office knife of today. Many of those greenbacks helped create the hidden productive features that we rarely use. Here are ten features of Microsoft Word. 5 Microsoft Word Settings You Should Definitely Customize 5 Microsoft Word Settings. You should definitely customize. There are many default Microsoft Word settings that you can customize. Here are some important ones that can make you more productive. Read More
Writers want peace. The visual clutter of Microsoft Word spawned a legion of distraction-free editors with undisturbed peace. But if you love Word, you can use a quick shortcut to hide the visual clutter of the Ribbon. press Ctrl + F1 to toggle the view ribbon.
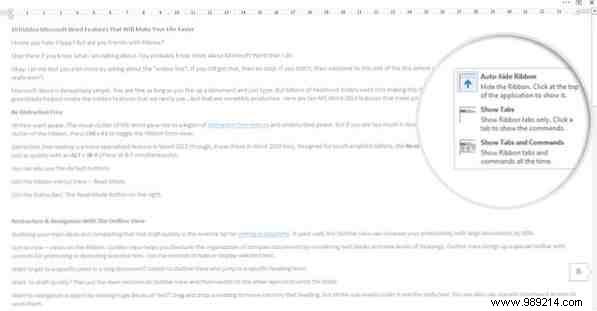
Adjust it by clicking Ribbon display option and selecting Autohide the ribbon .
Distraction-free reading However, it is a more specialized feature in Word 2013 and 2016, but it was there in Word 2010 as well. Designed for touch tablets, Reading Mode It works fine on an everyday laptop as well. Access just as quickly with an ALT + W-F (Press W &F simultaneously).
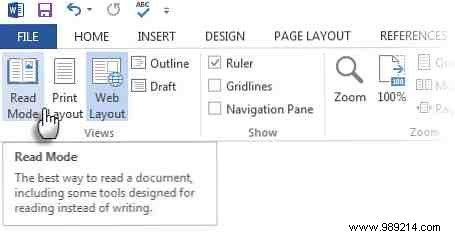
Optionally use the default buttons:
Double-tap or double-click the mouse to zoom in and make graphics such as tables, charts, and images fill the screen.
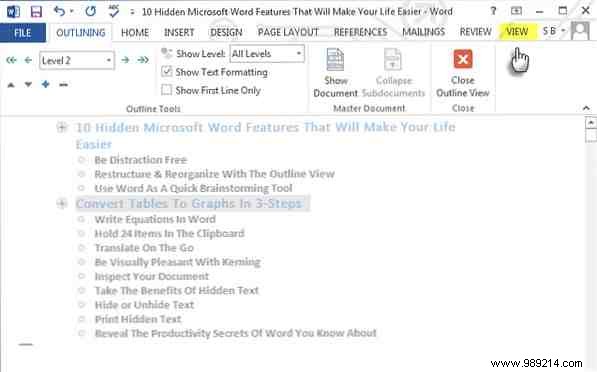
Summarizing your main ideas and completing the first draft quickly is the safe tip for writing productivity. If used well, the Exterior View You can increase your productivity with large documents by 50%.
Go View> Views on the tape Outside view helps you fine-tune the organization of complex documents by reordering blocks of text and nine levels of headings. Outline View features a special toolbar with controls to promote or demote selected text. Use the controls to hide or show the selected text.
Double click anywhere and start typing. You don't need to worry about positioning a cursor if you don't want to. This is the closest Microsoft Word to freestyle writing. Click and Type has been around since Word 2002. The feature only works in Print Layout view or Web Layout view.
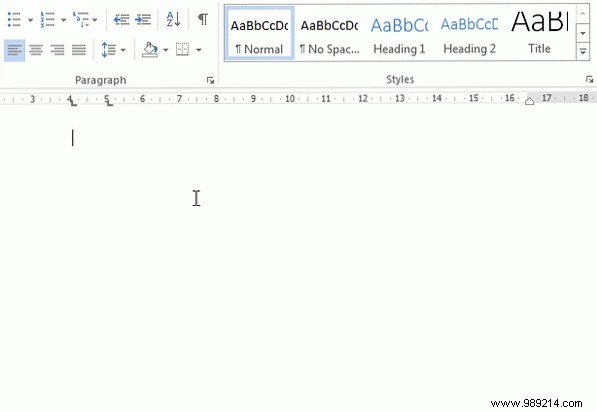
Although this is very useful for inserting text and graphics, you can also use it for impromptu brainstorming as a freeform mind mapping tool. Word Quickly Free templates are not just beautiful documents, perfect resumes and covers. They can also be vital for brainstorming and mind mapping. Here are eight Word templates for your ideation needs. Read more.
Take your pick:a neatly formatted table with lots of data OR a well-made chart that visualizes that data for you?
Being visual creatures, it's often a no-brainer to opt for the latter. Microsoft Word makes it easy to convert tabular information into a graphic. When you don't have much tabular data, create a chart in Word instead of over-killing with Excel. Select the table with the data and follow three steps...
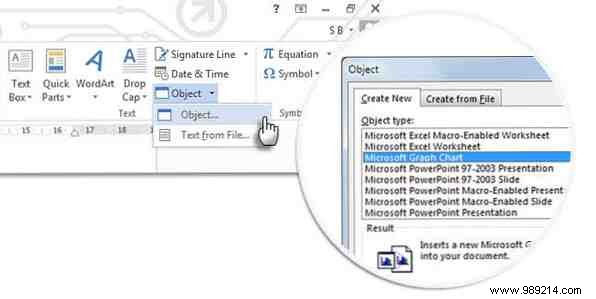
Microsoft Word displays tabular data as a neat chart. You can format your graph like any other document element.
And You Think Only Excel Formulas Are Amazing 3 Crazy Excel Formulas That Do Amazing Things 3 Crazy Excel Formulas That Do Amazing Things Conditional formatting formulas in Microsoft Excel can do amazing things. Here are some Excel formula productivity hacks. Read more . The Equation Editor has always been a part of Microsoft Word. In Word 2013 and 2016, it is known simply as an Equation (available under Insert - Symbols).
Choose Insert> Equation> Insert new equation .
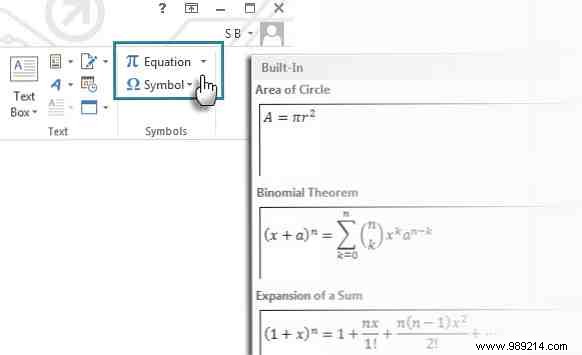
Use the equations toolbar to design your own advanced equations for math, physics, or chemistry. Word gives you many familiar equations to insert with just one click.
A short tutorial from Lynda.com introduces the feature.
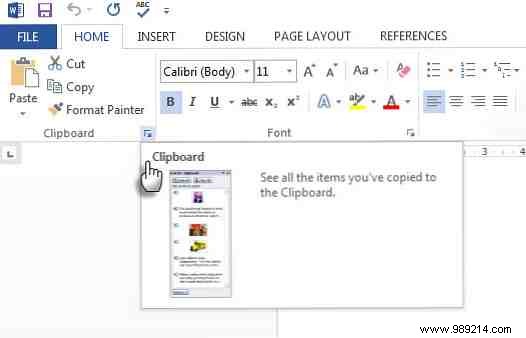
Unlike the Windows clipboard, the Word version can hold 24 items. In the Home tab, click the small drop-down arrow next to Clipboard to display the panel on the left. For the shortcut, press Ctrl + C twice to open the Clipboard Panel. This retention capability allows you to cut and copy multiple elements and move them anywhere within the document.
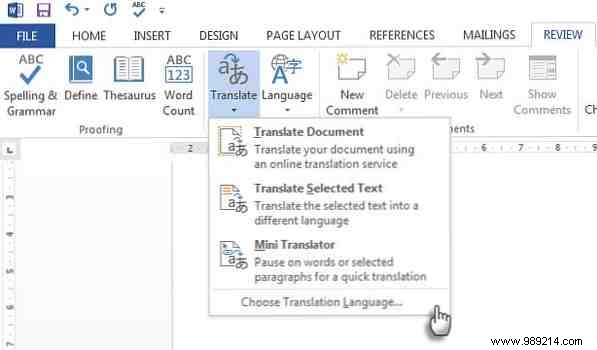
Microsoft Office uses Microsoft Translator to handle all translations. In Word 2013 and 2016, use the Translate review feature tongue. the Research The tab appears on the right and you can choose from many languages. Translate a word or a sentence. Or, translate the entire document and view it in your web browser.
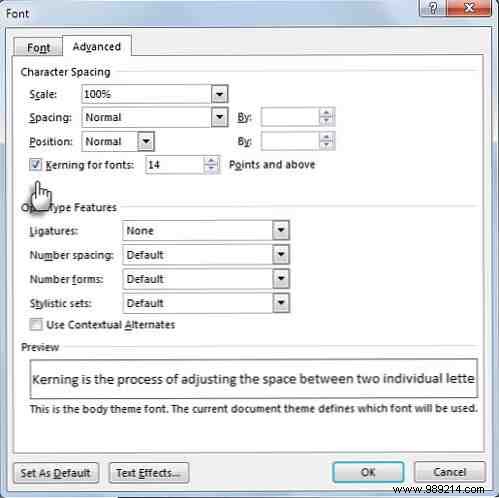
Kerning adjusts the space between two individual letters for a better visual appearance. When designing a document, each typeface requires its own specific kerning. Kerning becomes important when you design with large fonts in Word, for example. a cover of an e-book.
Word has kerning turned off by default, and you usually don't need to bother with it. But let's say you need to submit a five-page assignment. Save effort by increasing the width between letters instead of typing fluff!
Click the little popup arrow on Source (on the House tongue). Alternatively:Click Ctrl + D . Select the checkbox for Kerning for fonts . Experiment by entering a small point size in the box. Remember that some fonts and font sizes don't look good with kerning.
Si realmente quieres mejorar con el kerning y las fuentes, prueba el juego Kern Type que mencionamos en un artículo anterior sobre los juegos de fuentes..
Estos días se trata de compartir. También se trata de seguridad. los Inspector de documentos es la consola central en Microsoft Word que le ayuda a revisar su documento para cualquier información que desee mantener en privado. Cada vez que creas o incluso editas un documento, parte de la información del usuario se agrega al archivo automáticamente. El Inspector de documentos le ayuda a borrar este tipo de información antes de compartir un documento.
Para acceder al inspector de documentos:
Ir Archivo> Información> Preparar para compartir> Comprobar problemas> Inspeccionar documento .
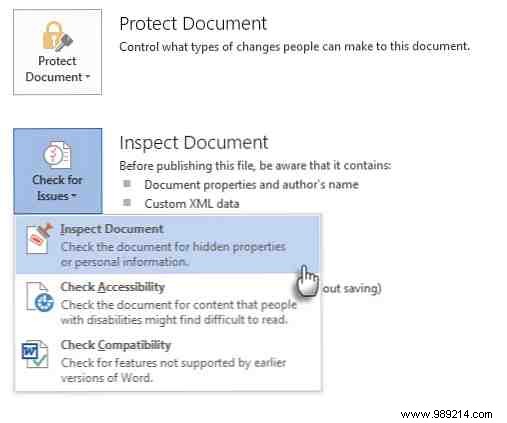
Inspeccione el contenido oculto seleccionando las casillas de verificación. Después de la inspección, cualquier categoría con datos confidenciales obtiene un signo de exclamación. Un botón Eliminar todo para cada categoría elimina los datos y finaliza el documento.

Office Support lo lleva paso a paso sobre cómo utilizar el Inspector de documentos.
Oh si. Esta característica está realmente oculta. El texto oculto es un atributo de carácter no imprimible que tiene su utilidad. Ocultar texto puede ser útil en muchas situaciones:
Ocultar o mostrar texto
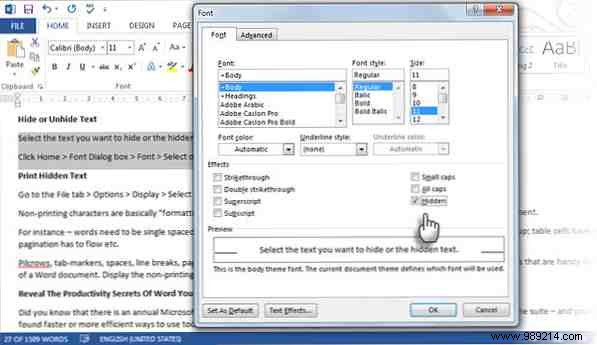
Los caracteres no imprimibles son “marcas de formato” que permite al usuario solucionar problemas y ajustar el diseño de un documento.
Por ejemplo, las palabras deben estar separadas por un espacio; Sus párrafos deben estar espaciados con saltos de línea correctos; todas las pestañas deben estar alineadas; las celdas de la tabla tienen que ser formateadas cuidadosamente; la paginación tiene que fluir, etc..
Algunos de los elementos no imprimibles que son útiles para controlar el diseño de un documento de Word son algunos de los elementos no imprimibles que son útiles para controlar el diseño de un documento de Word. Muestre los caracteres que no se imprimen haciendo clic en el botón Pilcrow en la Casa tongue. Alternativamente, presione Ctrl + * .
Nota: En Word 2013 y 2016, también puede expandir o contraer partes de un documento para mostrar información de forma selectiva.
¿Sabías sobre el campeonato anual de Microsoft Office? Los participantes son los campeones en el uso de la suite, y puede apostar que han encontrado formas más rápidas o más eficientes de usar herramientas como Word para sus trabajos cotidianos. Probablemente, hay un campeón dentro de ti..
Para profundizar, ¿por qué no echa un vistazo a la pestaña de desarrollador oculta en la cinta de Word Cómo agregar la pestaña de desarrollador a la cinta en Microsoft Word y Excel Cómo agregar la pestaña de desarrollador a la cinta en Microsoft Word y Excel Veamos cómo puede agregar la pestaña Desarrollador a la Cinta en Microsoft Word y Microsoft Excel y abre características avanzadas. Read more ?