When you first open Microsoft Word, you can start creating documents right away. The application offers many built-in features and default settings to help you produce the exact type of document, whether it's a professional report for business or a document for school.
You will see useful tabs, buttons and toolbars. And behind the scenes, Word handles spelling, grammar, and other proofreading for you. Most people start writing and don't think about these tools. But you can improve your app experience by simply taking a few minutes to adjust these settings.
Changing the way Word handles your spelling and grammar is a great start to customizing the app to fit your needs. These types of settings are useful for making sure you're not misspelling words or using incorrect grammar. But they can also be distracting in some cases.
For example, you may work for a company that uses all capital letters in the name or has a name that is a combination of a word and a number. You can adjust your settings for such situations so that you don't continually see error indicators How to stop Microsoft Word from underlining the correct words as errors How to stop Microsoft Word from underlining the correct words as errors Microsoft Word tends to underline words that aren't even errors . Here's how to prevent that from happening. Read More
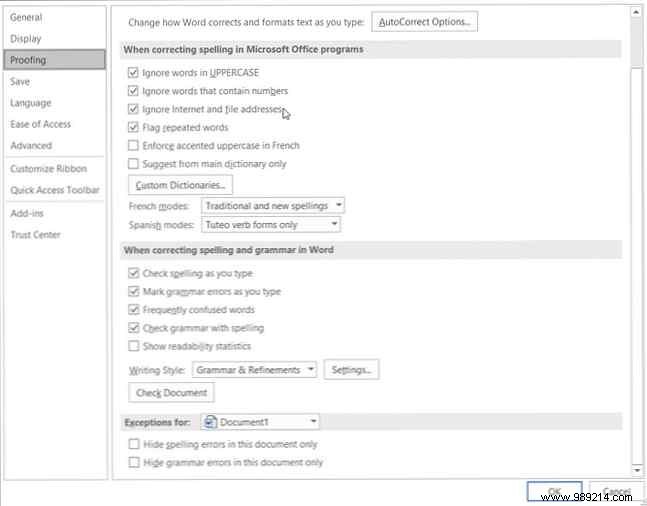
Open Word on your Windows computer to any document. Select File in the menu, click Options , and then collect Review . You'll see all your options for correcting spelling and grammar. Some apply to all the Microsoft Office programs you have, while others apply only to Word.
Open Word on your Mac with any document. Select Word from the menu bar, choose Preferences , and then click Spelling and Grammar . You will see a lot of settings listed under Spelling and Grammar.
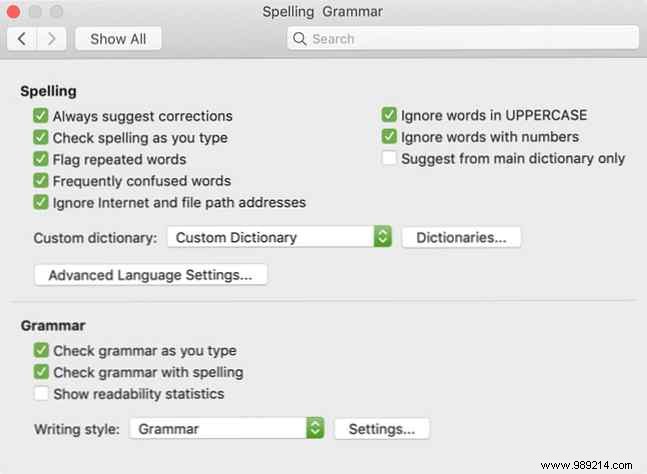
Using our example above for the company name, you can check the boxes to ignore capitalized words and ignore words with numbers, on both platforms. You can also enable or disable settings to check spelling or grammar as you type, flag repeated words, and ignore Internet and file path addresses.
Take the time to read each setting for the ones you really want to use and the ones you'd rather not use.
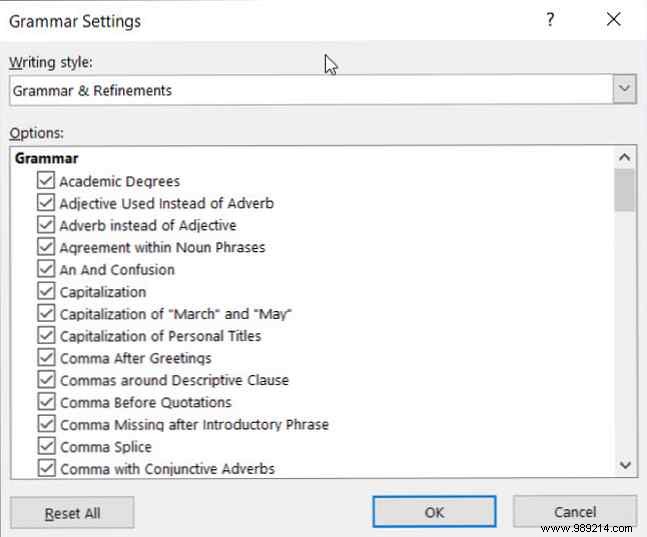
Also, if you click the Settings button, you can enable or disable many additional grammar settings, such as capitalization, comma usage, slang, and redundancy. This is also a useful area to review the settings that are right for you.
On Windows, the button is on the When correcting spelling and grammar in Word. section and on Mac, it's under Grammar .
Just like the spelling and grammar options, the AutoCorrect feature is there to help you avoid mistakes in your documents. But as we have seen many times, AutoCorrect is not always so correct when it comes to what we are really trying to say.
If your company name starts with two uppercase letters, it will automatically correct to just the first letter by default. This, like our other examples with your company name, can be distracting and even aggravating when creating documents.
On the other hand, you may want to fix specific things for yourself. For example, it is convenient to capitalize the names of the days of the week and the first letters of sentences. Here's how to adjust those settings on both Windows and Mac.
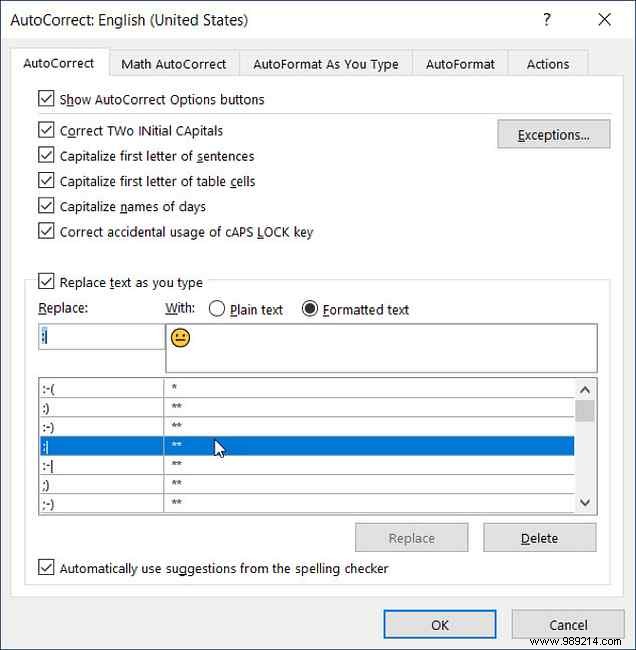
In Word on Windows, select File in the menu, click Options , and then collect Review . Click on the AutoCorrect button at the top of the window.
In Word on Mac, select Word from the menu bar, choose Preferences , and then choose AutoCorrect .
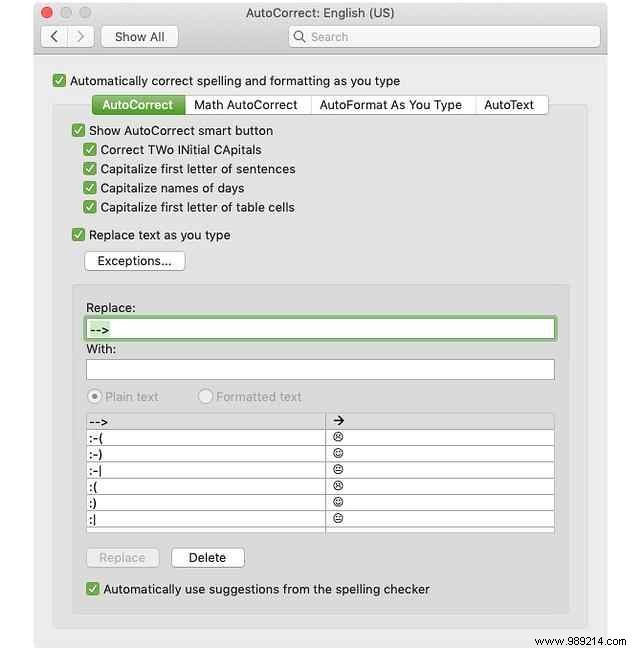
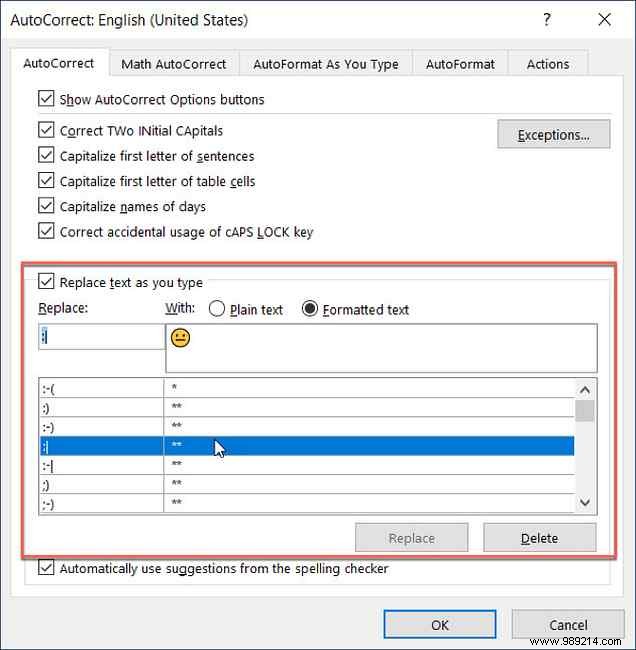
In the pop-up window, you can enable or disable the above types of AutoCorrect options with the click of a checkbox. You can also create exceptions to the rules you have in place by clicking the Exceptions button. button. This is the perfect place to set that company name to two uppercase letters because Word will ignore that as a rolling error.
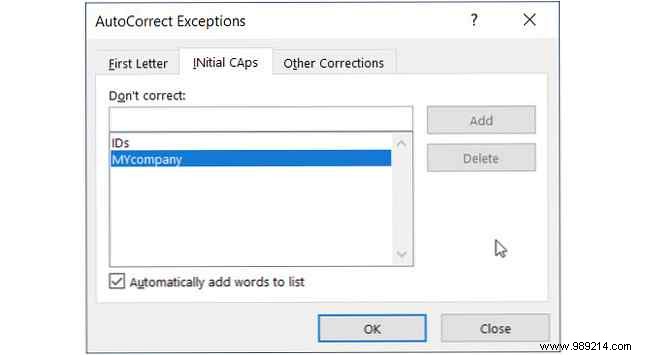
Click Exceptions and then the Initial Caps tongue. Enter the word you want Microsoft Word to ignore that contains two capital letters at the beginning. You can also check the First letter tab for built-in exceptions to rules and add more in the Other fixes tongue. Click OK when you finish.
Back on the main AutoCorrect screen, the bottom of the window allows you to review existing replacements and add your own. Things like special characters, emojis, and commonly misspelled words are listed to automatically change when they're typed. You can add to the list or remove any you don't want anymore.
The Quick Access Toolbar is located at the top left of the Word window. It's meant to be a place for you to access the tools you need quickly, as the name implies. Take the time to customize this toolbar as it will save you a lot of time later on.
By default, the toolbar contains buttons such as Save, Undo, and Redo. But if you use different tools much more often, then it is better to put them in this handy place. This way you can perform the quick actions you need with just one click.
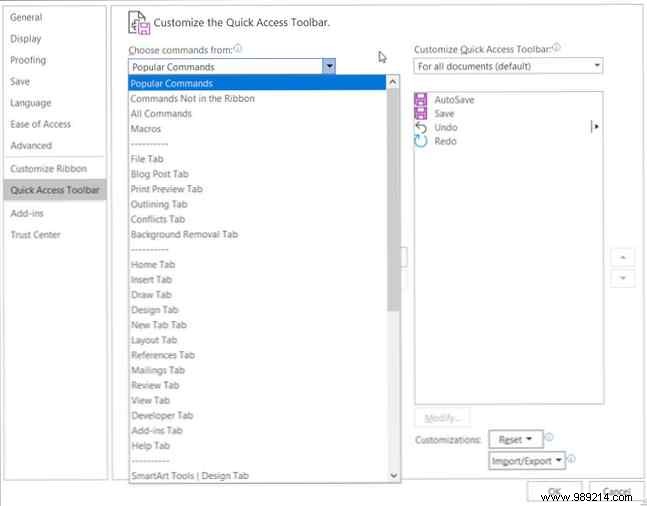
On Windows, select File in the menu, click Options , and then pick Quick Access Toolbar .
On Mac, select Word from the menu bar, choose Preferences , and choose Ribbon and Toolbar . Click the Quick Access Toolbar Button at the top of the window.
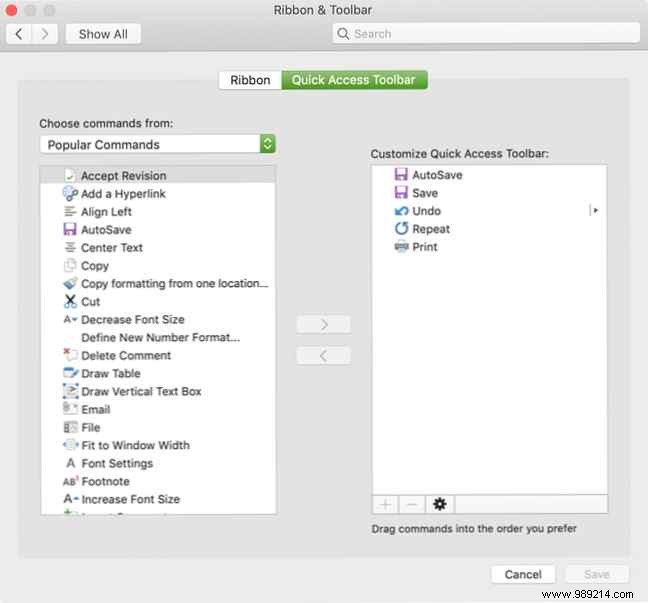
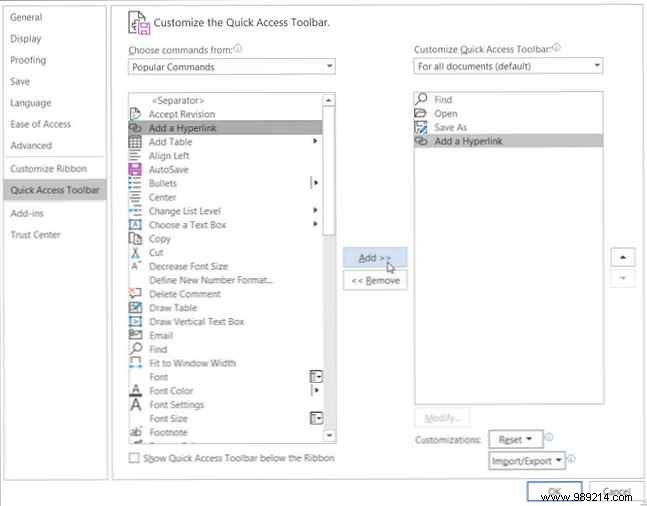
In the Quick Access Toolbar settings area, the items on the left are the commands you can use, and the items on the right are the ones currently on the toolbar. You can remove an action from the toolbar by selecting it and clicking remove arrow in the center. To add an action, select it on the left and click Add in the center.
You can choose from Popular Commands or click the dropdown box for a full list of actions that exist on Word tabs. Therefore, you may use the Find, Open, Save As, and Add a Hyperlink tools frequently. Click each one on the left and add them to the right. Click OK when you finish.
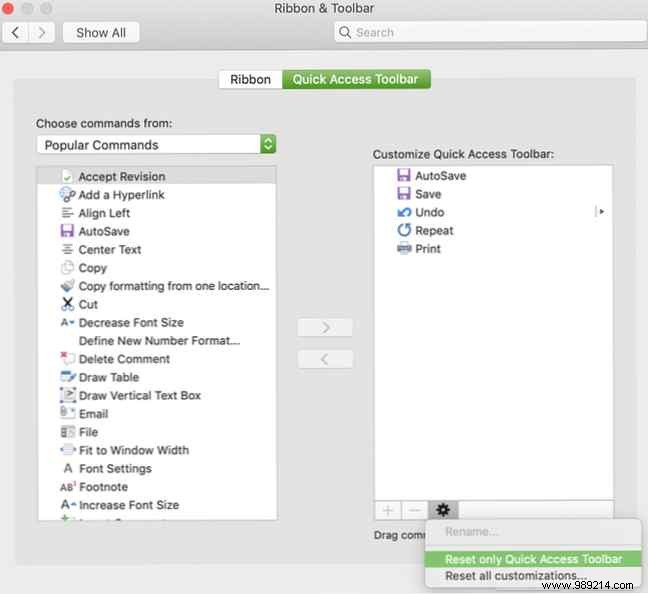
If you ever want to go back to the default commands, go back to the Quick Access Toolbar settings. Then in Windows at the bottom of the window under Personalizations , click Restart and then Reset Quick Access Toolbar Only . On Mac, click Settings (gear icon) button and choose Reset Quick Access Toolbar Only .
The Ribbon in Word is another point you should consider customizing. Just like the Quick Access Toolbar, you want the actions you use most at your fingertips.
By default, Word has tabs at the top for things like Home, Insert, Draw, Design, and View. But if you never use the Draw or Design tabs, why have them there taking up space?
At the same time, maybe there are commands within the Home tab that you'd like to use in an order that's most useful to you. These kinds of customizations lead to a more productive Word experience.
On Windows, select File in the menu, click Options , and then pick up Customize Ribbon .
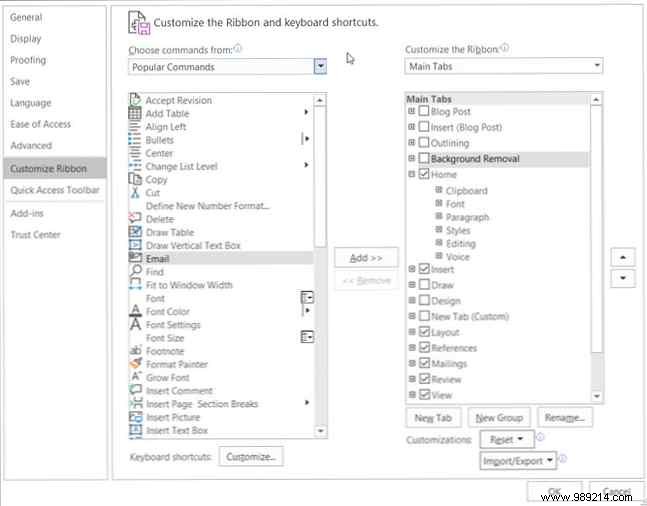
On Mac, select Word from the menu bar, choose Preferences , and choose Ribbon and Toolbar . Click the Ribbon button at the top of the window.
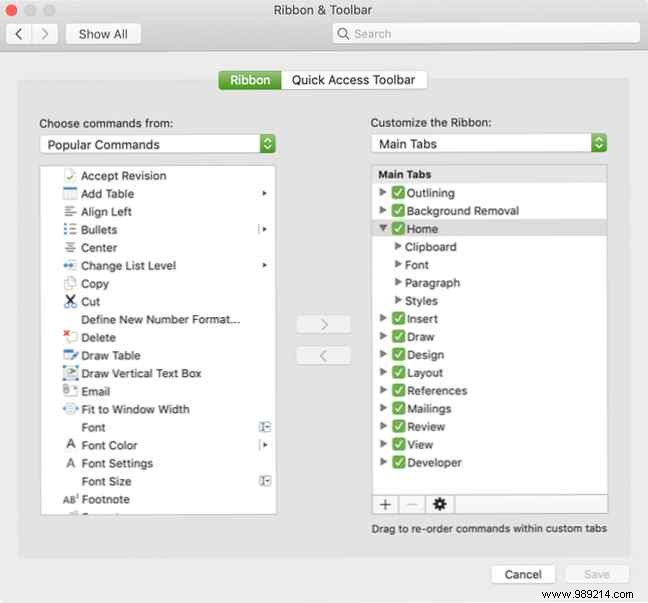
Like the Quick Access Toolbar settings, the Ribbon Settings window has commands on the left and currently used actions on the right. Place them on the tape or off the tape using the Add and remove arrow buttons in the center.
To learn more about how to customize your Microsoft Word Ribbon in Windows, check out our detailed tutorial How to Optimize the Office 2016 Ribbon or Menu Interface How to Optimize the Office 2016 Ribbon or Menu Interface Do you often look for menu items? in Microsoft Office? It's time to reorganize and customize the Ribbon menu for your personal needs. You will be surprised how flexible and easy it is! Read more.
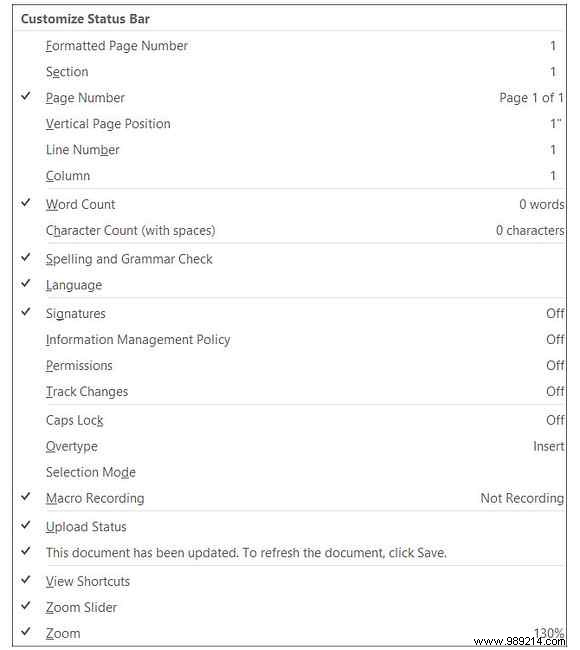
The status bar, which sits at the bottom of the Word window, is the last place you probably won't touch as far as customizations go. However, this toolbar provides a lot of useful information, so it's worth tweaking.
For example, if you constantly check your word count or change Word layout views How to Customize Microsoft Word Layout Settings How to Customize Microsoft Word Layout Settings Microsoft Office includes many useful templates, styles, and themes. We'll show you all the settings you need to create your own custom layout in Word 2013 and Word 2016. Read More Alternatively, you may never need a macro recording tool or vertical page position, so you can remove them.
In windows, right mouse button in the status bar and on Mac neither right mouse button or hold the Control key and click on it.
When the menu appears, simply check the items you want to display in the status bar. You will see that this toolbar automatically updates as you check and uncheck the various options.
When you take the time to review settings 10 Microsoft Word Defaults You Can Optimize 10 Microsoft Word Defaults You Can Optimize A few simple optimization steps can amplify your productivity with Microsoft Word. We give you ten quick and easy settings for your daily tasks. Read More By changing little things like these, you can work more effectively.