Every email is a potential distraction. You can manage your emails using rules, priority markings, and color categories. This automated workflow. 6 Best Practices for Outlook to Boost Your Workflow. 6 Best Practices for Outlook to Boost Your Workflow. If you spend a lot of time using Outlook, you should investigate your workflow. Make your email work for you and save time for more important tasks. Read More
Consider automated conditional inbox formatting to take your productivity to the next level. Every message can be sorted and filtered the instant it hits your inbox. This article is intended for all Outlook users, though it might be particularly useful for those using IMAP email accounts. IMAP accounts do not allow extensive use of color categories that POP3 users can enjoy IMAP vs. POP3:What is it and which one should you use? IMAP vs. POP3:What is it and which one should I use? If you've ever set up an email client or application, you've probably come across the terms POP and IMAP. Do you remember which one you chose and why? If you are not… Read more .
Inbox conditional formatting is an automated method of coloring messages as they enter your inbox. We can assign a different range of colors, fonts, and styles to each message, specified in a range of conditions. If the conditions are met, the message will receive the respective formatting conditions, making it stand out and making your workflow easier.
Now I'll show you some quick examples to move your inbox.
Setting up multiple conditional inbox formatting rules is really quite simple, and can make a big difference to your workflow. 25+ Outlook Keyboard Shortcuts To Make You More Productive 25+ Outlook Keyboard Shortcuts To Make You More Productive Outlook is one of the most popular desktop email clients in use today. If you are one of those many Outlook users, the following keyboard shortcuts will surely save you a lot of time. Read more.
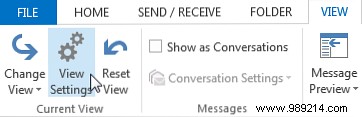
Go to the View tongue. Under Current View , select View settings . This will open the Advanced View Settings panel. Select Conditional formatting . This will show you a list of default conditional formatting options, some of which will already be in use.
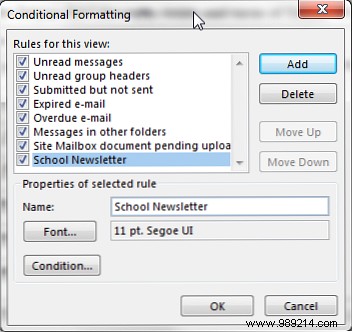
press Add . Enter a name for your first rule. I will make sure I never miss a school newsletter, so the rule is named “School Newsletter” accordingly. Now, choose a Font . It has the full range of Windows fonts available. OTF vs. TTF Fonts:Which is Better? OTF fonts vs. TTF:Which is better? Most fonts these days are either OTF or TTF, but what does that mean? What are the differences? Should you even care? Read More How to Download Free Fonts and Manage Them in Windows How to Download Free Fonts and Manage Them in Windows Fonts are the building blocks of digital aesthetics. Since Windows doesn't come with a font manager, we've seen third-party alternatives. Read more . However, while we're trying to keep our inbox workflow flowing, I'd suggest sticking to something sensible, that won't distract you.!
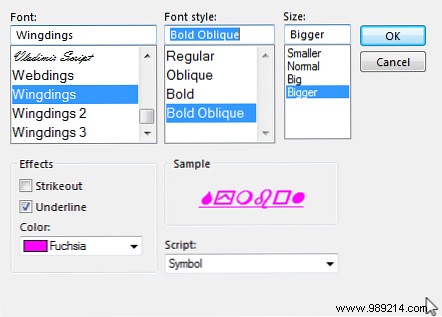
Once you've selected a font, choose a color and increase the font size to large (For some reason, this system removes the normal font points, probably so we didn't select an absurdly large size, which would break Outlook's inbox pane.) When you're ready, press OK .
Now select Condition . I'm only adding a single address to this rule, in the From cash register. If you know the unique address, enter it where appropriate. If you're adding a long list, or even just multiple addresses, press From will open your Outlook address book. Once you have added the required addresses, press OK , and return to your inbox. The rule will be applied from the next email you receive.
Now that we know how to create conditional formatting for incoming mail, we can start specializing our rules. The Conditions panel has three tabs:Messages , More elections , and Advanced . Can we use each tab to simplify our inbox? Is it buried in emails? Reduce your massive inbox to zero with Mailstrom buried in emails? Reduce your inbox clutter to zero with Mailstrom Over the years, we've offered a number of solutions to manage your Gmail account and clean up a cluttered inbox. Nothing is more convenient than a central online solution like Mailstrom. Read more.
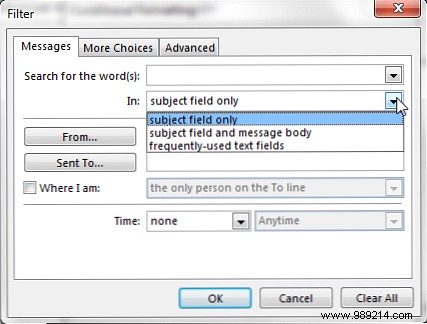
Use the Messages tab to create a specific word search for each email as it arrives. Isolate a keyword, words or phrases that repeatedly enter your inbox 5 Action Steps to Heal Your Inbox Email Frenzy Brain 5 Action Steps to Heal Your Inbox Zero Email Frenzy Inbox Zero is one of the most popular words. To truly solve your email problems, you need to go beyond Inbox Zero and address the underlying issues. Read More
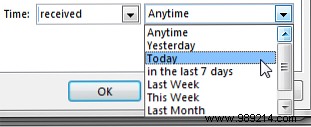
We may also format our emails, based on a variety of time filters, including time received, sent, created, modified, and when the email arrived in your inbox, such as Anytime, Yesterday, In the last 7 days or Last week.
the More elections The tab is where you'll find the color categories, as well as options to match items that are unread or unread, have multiple attachments, have different levels of importance, or have been flagged independently by the user.
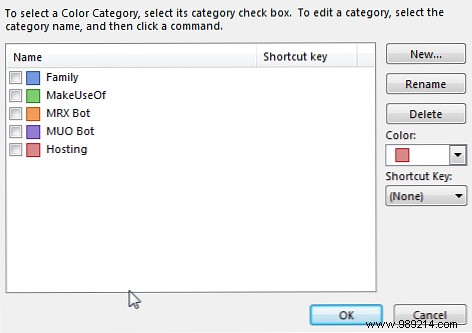
The color category formatting filters are the same ones you've already set, but make it easier to build the color rules you're already using. This way, you can automate your colors.!
the Advanced The tab allows us to create specialized conditional formatting criteria to filter and apply to your inbox. Clicking on the Field The button will give you access to a somewhat overwhelming list of possible filter criteria, from which you can select multiple options to build a “filter tree.”
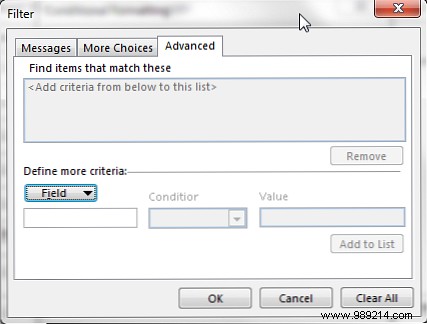
There are a plethora of options here, but don't let that put you off creating your own lists. Take your time and scan each list. A lot of options just won't apply to your inbox, so in theory you should narrow down your search range.
You should now be able to set up a range of conditional formatting rules for your inbox, whether it filters everything in specific folders or not. Even emails that go to those specific folders can carry the formatting with them, allowing you some variation on how to apply specific colors. For example, instead of highlighting specific names, try coloring and filtering on a specific topic or keyword.
Conditional formatting is incredibly easy to set up, and once it's up and running, it will keep your inbox, and hopefully your mind, somewhat clear of digital clutter 5 Action Steps to Cure Your Inbox Email Brain Frenzy 5 Action Steps to Cure Your Inbox Zero Email Frenzy Inbox Zero is one of the most popular buzzwords. To truly solve your email problems, you need to go beyond Inbox Zero and address the underlying issues. Read more.
Do you use conditional inbox formatting? Do you have any tips or tricks for our readers? Let us know below!